
 Click to zoom
Important safety notes (read first)
Repairing an iPhone 7 is very doable for beginners, but you must work slowly and methodically. The iPhone 7 uses strong adhesive, delicate flex cables, and a water-resistance sealing concept that you will break when opening the phone.
- Back up your data before any repair.
- Power off the phone completely.
- Use eye protection when heating adhesive.
- Never puncture or bend the battery. If a battery swells or smells sweet/chemical, stop immediately and move it to a safe area.
- Water resistance will be reduced after opening. If you want it back, replace the display adhesive gasket.
This guide covers the most common repairs: battery replacement and screen replacement, plus quick diagnostics for typical problems.
What you’ll need (tools and parts)
Tools
- P2 pentalobe screwdriver (bottom screws)
- Tri-point Y000 (some internal screws) and/or Phillips #000 (varies by screw set)
- Plastic picks / spudger
- Tweezers
- Suction cup
- Heat source (heat pad, iOpener, or hair dryer on low)
- Small screw organizer / magnetic mat
- Optional: isopropyl alcohol (90%+), ESD strap
Parts (depending on the repair)
- iPhone 7 battery (quality aftermarket or OEM pull)
- iPhone 7 screen assembly (digitizer + LCD)
- Display adhesive gasket (recommended)
- Battery adhesive strips (recommended)
Part 1: Quick diagnostics (before opening)
1) Phone won’t turn on
- Try a known-good charging cable and charger.
- Clean the charging port carefully (no metal tools).
- Force restart: hold Power + Volume Down for ~10 seconds.
- If it boots only while plugged in, the battery may be degraded.
2) Touch not working / lines on display
If the screen shows lines, flickers, or touch is dead, most often it’s a screen assembly issue or a damaged flex connection.
3) No sound from speaker / calls quiet
- Test with headphones and speakerphone.
- iPhone 7 has known audio-related failures (commonly called “Audio IC” issues). A screen/battery replacement will not fix that; it’s board-level repair.
If diagnostics point to battery or screen, continue below.
Part 2: iPhone 7 battery replacement (step-by-step)
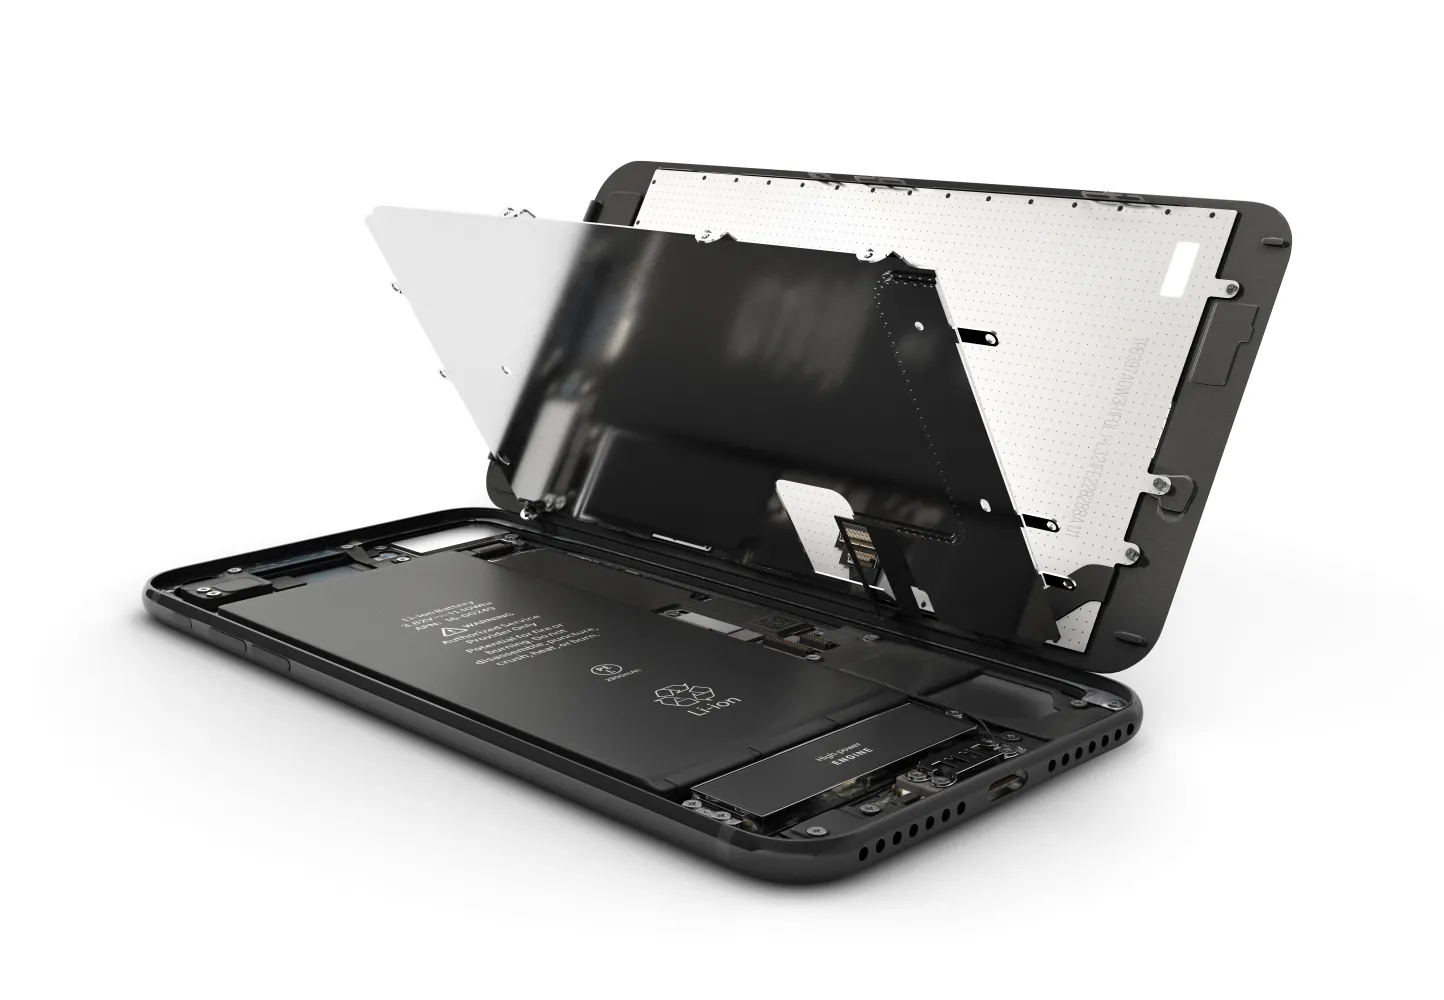
Step A — Open the iPhone 7
- Power off the iPhone.
- Remove the two pentalobe screws next to the Lightning port.
- Warm the lower edge of the phone for 60–90 seconds to soften adhesive.
- Use a suction cup near the bottom edge and gently lift to create a small gap.
- Insert a plastic pick and work around the edges to cut adhesive.
- Open the display like a book from the right side, because the display cables are on the right.
Do not open more than necessary. Flex cables can tear if you pull too far.
Step B — Disconnect the battery first
- Remove the metal connector shield (several small screws).
- Use a plastic spudger to disconnect the battery connector.
Disconnecting the battery first reduces the chance of short circuits.
Step C — Remove the battery
- The battery is held with adhesive strips. If you have pull tabs, pull them slowly and evenly.
- If the strips snap (common), apply a little isopropyl alcohol along the battery edges and wait 1–2 minutes.
- Gently pry from the bottom edge with a plastic tool. Do not puncture the battery.
Step D — Install the new battery
- Clean leftover adhesive and dust.
- Apply new battery adhesive strips and seat the new battery.
- Reconnect the battery connector (but do not fully close the phone yet).
Step E — Test before sealing
- Temporarily reconnect the display if you disconnected it (see the Screen section below).
- Power on the phone, confirm it boots and charges.
- Power off again, then reassemble shields and screws.
Post-repair check
- Battery percentage should increase when charging.
- No overheating, no random restarts.
Part 3: iPhone 7 screen replacement (step-by-step)
A full screen replacement is often easier than attempting to repair only glass.
Step A — Open the phone (same as battery steps 1–6)
Follow the “Open the iPhone 7” steps above.
Step B — Disconnect battery and display cables
- Remove the connector shield screws and shield.
- Disconnect the battery connector first.
- Disconnect the display connectors (usually multiple flex cables).
Step C — Transfer components (if your new screen is “bare”)
Many replacement screens come without the front camera/sensor assembly, earpiece speaker, and home button assembly installed.
1) Transfer the home button (critical note)
The iPhone 7 home button contains Touch ID pairing to the original logic board. If you replace the home button with a different one, Touch ID will not work, and the button may not function properly at all unless it’s the original.
Carefully move the original home button assembly to the new display.
2) Transfer earpiece speaker + front camera/sensors
- Remove the earpiece speaker bracket.
- Move the speaker and the front camera/sensor flex to the new screen.
- Be gentle: these flex cables tear easily.
3) Transfer the metal backplate (if needed)
Some screens require moving the metal shield/backplate. Keep screws organized by location.
Step D — Install the new screen and test
- Connect display flex cables firmly (do not force).
- Connect the battery last.
-
Power on and test:
- Display brightness and colors
- Touch response across the whole screen
- Front camera
- Earpiece speaker on a call
- Home button click/response (Touch ID should still work if original button was kept)
Step E — Apply display adhesive gasket (recommended)
Remove old adhesive from the frame, apply a new display adhesive gasket before closing the phone, then close carefully and reinstall the two bottom pentalobe screws.
Common mistakes to avoid
- Mixing screws: wrong screw length in the wrong hole can damage the board (serious and permanent).
- Forcing connectors: if a connector doesn’t click in easily, it’s not aligned.
- Opening angle too wide: flex cables can tear.
- Prying battery aggressively: use alcohol + patience.
After-repair checklist
- Phone boots reliably
- Touch works on all areas
- Cameras work (front and rear)
- Speaker and microphone work
- Charging works and battery percentage is stable
- No abnormal heat
- Screen sits flush and no gaps around the frame
When to stop and seek board-level repair
- The phone shows “boot loop” or restarts repeatedly after verified good battery and screen.
- No audio (especially known iPhone 7 audio faults).
- No service / baseband issues.
- Water damage signs (corrosion) on connectors or shields.
Final note
Start with one repair at a time—battery or screen—then test thoroughly before sealing. With careful screw organization and gentle handling of flex cables, an iPhone 7 is one of the best practice devices for beginners.